
I have been asked by friends in the past how to add ribbons to their Bibles. I thought I’d take a moment to share the two easiest methods I’ve employed for doing this. There are two ways most people do this. One way is pretty easy, and the results are pretty good. The other way is a bit trickier with slightly better results.
FYI, the ribbons in the Bible pictured above are stock. They are in my R.L. Allan NASB Reader’s. This is what most of us are are trying to emulate. High quality ribbons, and more than just one. Most mass produced Bibles these days come with one, low quality ribbon marker. I like to have at least three ribbon markers. One for my daily Old Testament reading, one for devotional or current study, and one for my daily New Testament reading.
The first way is to get an acid free glue that will hold fabric to paper.(I use a book binding water based glue.) Open the Bible up all the way to make the cover over the spine open up. Then, measure out some pieces of ribbon so that there will be about 2 to 2.5 inches of the ribbon in the spine, with the rest in between the pages, with about 2 to 4 inches hanging out the bottom. That last one is whatever your preference is. Then have a popsicle stick or butter knife handy. With your finger, smear a good dab of glue on the first ribbon to go in. Keep it to just the part that is going to be attached to the spine. Then, carefully slide it down to where you want it. Then, press it firmly to the spine. Repeat the process for additional ribbons.
Keep in mind the more ribbons you want, the more narrow they will have to be. You don’t want to go too narrow, because they could tear your pages when you use them to open your Bible. You also don’t want them to be too thick or thin. Thick ones will make imprints on the pages. Too thin, and they will curl up, and wrinkle or fold on you. They also don’t last as long.
After you’ve put the ribbons in, use some heat to sear the edges where the ribbons were cut to stop them from fraying. I don’t generally worry about the end inside the Bible as the glue will keep it from fraying as well as the fact that it is inside the spine. You can also heat up a butter knife on the stove to use as an iron to put a fold in the ribbon at the top of the Bible, so it folds the way you want it. This method ends up with the ribbons covering the head band. For some people this isn’t acceptable.
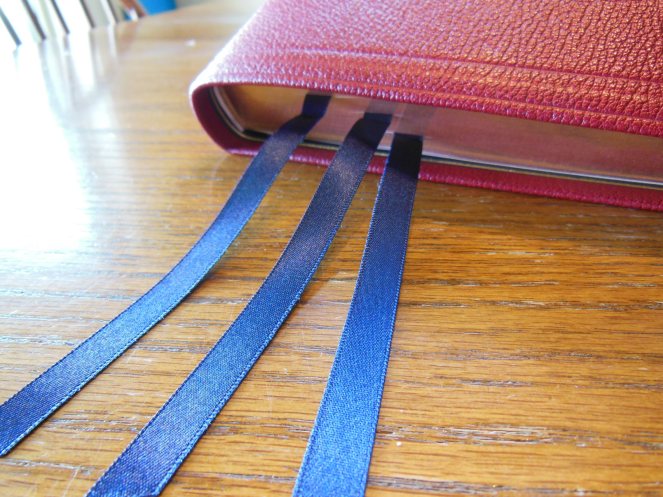
If you want to put them under the headband so the Bible looks more professional, you have to use an exacto blade or some other thin bladed knife to put it between the head band and spine. You have to pry it up from the spine without tearing it or cutting it. Once you have removed it, glue the ribbons into place. Let them dry. Put more glue on the head band. Slide it into place. Press it down and find some way to keep it pressed onto the spine until the glue can hold it. Then don’t mess with it until it has all dried overnight. Give it a good 12 hours to dry, and be carefull with it for a couple of days. The glue takes awhile for maximum adhesion.
One final word on ribbon selection. I like satin or silk ribbons the best. I think they look, and hold up better.(Berisford in the U.K. is one of the prefered manufacturers.) Find a color that complements your Bible’s cover. If you search Amazon, you’ll see a pretty big selection of silk ribbon. You can also try Joann’s fabric store or Hobby Lobby.
Finally, watch this video that my Facebook friend, and fellow Bible lover, Paul Tanca made to help you.
Keep in mind, if you plan on keeping your original ribbons in the Bible and just want to add more, do not cut your old ones out. Also, he is using the second method.
